Screen print transfers are a great way to apply custom designs to t-shirts, bags, and other fabric items. Here are the general steps for making screen print transfers:
Contents
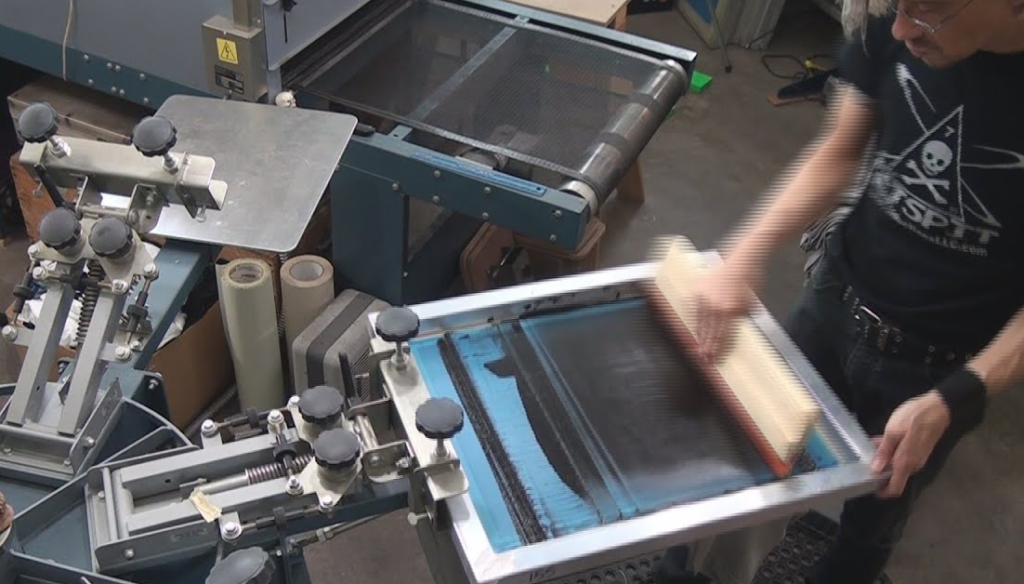
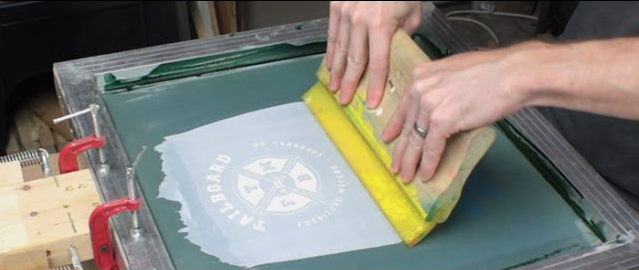
Screen Print Transfer Process
- Create your design: Use graphic design software or drawing tools to create your design. It’s important to use black and white artwork, or convert your color design to grayscale, as screen printing uses a halftone process to create the final print.
- Print your design onto transfer paper: Print your design onto special transfer paper using a laser printer or photocopier. Be sure to follow the instructions for your particular transfer paper to ensure proper printing.
- Cut out your design: Use scissors or a craft knife to cut out your design from the transfer paper.
- Heat your transfer: Use a heat press machine to apply your transfer to your fabric item. Set the temperature and time according to the instructions for your transfer paper.
- Peel off the transfer paper: After the transfer has been heated and cooled, carefully peel off the transfer paper to reveal your printed design.
- Cure your print: To ensure the print is durable and long-lasting, you’ll need to cure it by heating it in a dryer or with a heat press machine. This step will depend on the type of transfer paper you’re using, so be sure to follow the instructions.
- Finish your item: Once your print is cured, you can finish your fabric item as desired, such as by sewing it into a shirt or bag.
Keep in mind that these are general steps for making screen print transfers, and the exact process may vary depending on the transfer paper you use and the equipment available to you. Be sure to follow the instructions for your particular materials to achieve the best results.
Do Electric Cars Need Oil Changes
What is an output device? Definition and types of output devices
What is an input device? Definition and types of input device
Advantages Of Screen Print Transfers
Screen print transfers are a great way to apply custom designs to t-shirts, bags, and other fabric items. Here are the general steps for making screen print transfers:
- Create your design: Use graphic design software or drawing tools to create your design. It’s important to use black and white artwork, or convert your color design to grayscale, as screen printing uses a halftone process to create the final print.
- Print your design onto transfer paper: Print your design onto special transfer paper using a laser printer or photocopier. Be sure to follow the instructions for your particular transfer paper to ensure proper printing.
- Cut out your design: Use scissors or a craft knife to cut out your design from the transfer paper.
- Heat your transfer: Use a heat press machine to apply your transfer to your fabric item. Set the temperature and time according to the instructions for your transfer paper.
- Peel off the transfer paper: After the transfer has been heated and cooled, carefully peel off the transfer paper to reveal your printed design.
- Cure your print: To ensure the print is durable and long-lasting, you’ll need to cure it by heating it in a dryer or with a heat press machine. This step will depend on the type of transfer paper you’re using, so be sure to follow the instructions.
- Finish your item: Once your print is cured, you can finish your fabric item as desired, such as by sewing it into a shirt or bag.
Keep in mind that these are general steps for making screen print transfers, and the exact process may vary depending on the transfer paper you use and the equipment available to you. Be sure to follow the instructions for your particular materials to achieve the best results.
Screen Print Transfers Needed Tools & Overall Process
To make screen print transfers, you will need the following tools:
- Computer and graphic design software or drawing tools to create your design
- Transfer paper for your laser printer or photocopier
- Scissors or a craft knife to cut out your design
- Heat press machine or iron to apply the transfer to the fabric item
- Fabric item to print on
- Protective paper or Teflon sheet to protect your heat press machine
Screen Print Transfers Hot Vs Cold Peel Transfers
Screen print transfers can come in either hot peel or cold peel varieties. The main difference between the two is how the transfer paper is removed from the fabric item after it has been applied.
Hot peel transfers are removed from the fabric item immediately after they are pressed with a heat press machine. The transfer paper is peeled off while the paper is still hot, and the transfer ink adheres to the fabric. This method is often used for creating soft hand prints, which have a softer feel and texture to the print.
Cold peel transfers, on the other hand, are left to cool down after pressing before the transfer paper is removed. The transfer paper is peeled off after the paper has cooled, and the transfer ink remains on the fabric. This method is often used for creating a thicker, more opaque print, with a glossy finish.
There are pros and cons to both hot and cold peel transfers. Hot peel transfers are faster and easier to apply, but the transfer ink can be prone to cracking if it is not allowed to cool down properly. Cold peel transfers take longer to apply, but the resulting print is often more durable and long-lasting.
Ultimately, the choice between hot and cold peel transfers will depend on your specific needs and preferences. Consider factors such as the desired texture, durability, and time constraints when choosing between the two.
>>> How to Fix No Display in Computer 2022
Prepping Screen Print Transfers
Properly prepping your screen print transfers is crucial to achieving the best possible results. Here are some steps you can take to prep your transfers:
- Choose the right fabric: Different fabrics require different types of transfers. Be sure to choose the right transfer for the fabric you’ll be printing on. For example, cotton fabrics work well with screen print transfers made for cotton, while polyester fabrics require a different type of transfer.
- Pre-wash the fabric: Pre-washing the fabric will remove any sizing or residues that could interfere with the transfer’s adhesion. Be sure to follow the instructions for washing the fabric to ensure that it is properly cleaned and ready for printing.
- Heat press the fabric: Before applying the transfer, it can be helpful to pre-heat the fabric with a heat press machine. This will help remove any moisture or wrinkles in the fabric, making it easier to apply the transfer.
- Cut the transfer paper: Carefully cut the transfer paper around your design, leaving a small border around the edges. Be sure to use sharp scissors or a craft knife to ensure clean, precise cuts.
- Position the transfer: Carefully position the transfer on the fabric, making sure it is straight and centered. Use a ruler or other measuring tool if necessary to ensure accuracy.
- Apply heat and pressure: Following the instructions for your specific transfer paper, apply heat and pressure to the transfer with a heat press machine or iron. Be sure to use the appropriate temperature and pressure settings to ensure the transfer adheres properly.
- Peel the transfer: Once the transfer has cooled down (depending on whether it’s a hot or cold peel transfer), carefully peel the transfer paper away from the fabric. Take care not to disturb the transfer itself, as this could damage the print.
By properly prepping your screen print transfers, you can ensure that your final product looks clean, professional, and lasts as long as possible.
how to make screen print transfers for shirts
Screen print transfers are a popular way to create custom designs on shirts. Here are the steps to create screen print transfers for shirts:
- Create your design: Start by creating your design on a computer or by hand. You can use design software like Adobe Illustrator or Canva to create your design.
- Print your design on transfer paper: Once you have your design, you will need to print it onto transfer paper using a high-quality printer. Make sure to follow the manufacturer’s instructions for your specific transfer paper.
- Cut out your design: Use a pair of scissors or a cutting machine to cut out your design. Be careful to follow the edges of your design and avoid cutting too much of the transfer paper.
- Preheat your shirt: To ensure that your design transfers evenly onto your shirt, preheat your shirt with an iron. Set your iron to the appropriate temperature for your shirt material and apply it to the area where you will be placing your transfer.
- Place your transfer onto your shirt: Place your transfer onto the preheated area of your shirt with the design facing down. Make sure to position it correctly.
- Apply heat: Use an iron or heat press to apply heat to the transfer. Follow the manufacturer’s instructions for your specific transfer paper, as the temperature and time required may vary.
- Remove the transfer paper: Once you have applied heat to the transfer, remove the transfer paper. Be careful not to damage your design as you remove the paper.
- Let your shirt cool: After removing the transfer paper, let your shirt cool for a few minutes. Your custom design is now complete!

By following these steps, you can create custom screen print transfers for shirts that are sure to impress.
I will keep writing more posts related to this, so do not forget to bookmark (Ctrl + D) our blog “EduTechGyan.COM” on your mobile or computer and subscribe to us now to get all the posts in your email.
If you like this post, then do not forget to share it with your friends. You can help us reach more people by sharing it on social networking sites like Facebook or Twitter. Thank you !